Chocolate Truffles – easy, dairy-free, vegan, gluten-free, and delicious!
I used to make truffles by mixing up chocolate dough, using my hands to roll balls, and dipping the balls in chocolate. Those were delicious and looked sophisticated — but they were a lot of messy work. I was thinking that it might be quicker and easier to “paint” chocolate into silicone molds, then add filling, and then top it off with more chocolate. So I tried making truffles that way instead. Oh my goodness — not only is it easy, but they are adorable — and delicious!!
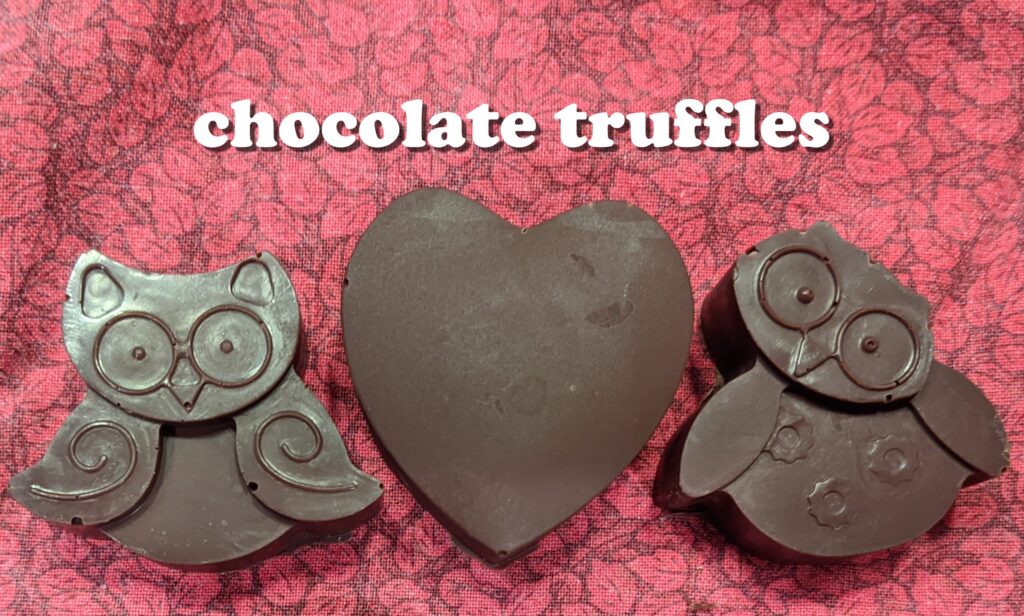
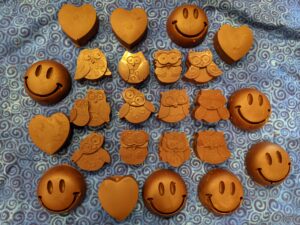
Note that the number of truffles this recipe makes depends on the size of the cavities on your candy molds. The owls in the picture are much smaller than the hearts and the smiley faces, so you can make more owls, or fewer of the bigger ones.
Either way: Yum!
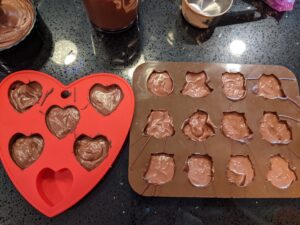
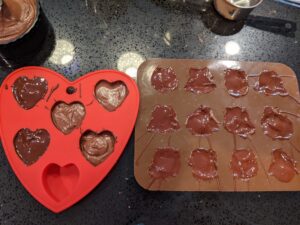
Truffle shells with filling added. It’s okay if chocolate drips on the candy mold: you can easily remove those later.
Chocolate Truffles - easy, dairy-free, vegan, gluten-free, and delicious!
Ingredients
- 1 1/2 cups chocolate chips divided (I like Equal Exchange bittersweet chocolate chips)
- 2 or 3 big dates with pits removed, and also remove any bits of stem (I currently like Joolie'sbrand)
- 1/2 cup cashews or other nuts or for a nut-free version, substitute your favorite nut-butter substitute, such as sunbutter, or sunflower seeds or pumpkin seeds
- 1/4 cup cocoa powder
- 1 teaspoon vanilla extract optional
- 1/2 cup water plus a few more tablespoons
Instructions
- Put 1 cup of the chocolate chips in a small microwave-safe bowl.
- Microwave for 1 minute. Stir.
- If they are not melted, microwave for another 30 seconds and stir, repeating until they are melted. Chocolate chips melt at about body temperature, so the idea is to get them to be warm and melted, but not super hot.
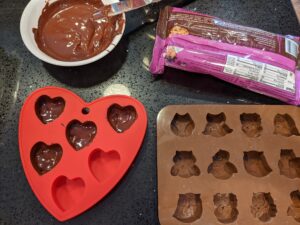
- Use a dinnertable knife to spread a dab or two of melted chocolate all over the inside of each cavity of a silicone candy mold or ice cube tray. In the picture I used this adorable owls mold, some smiley faces that I think have been discontinued, and hearts that I got at my local Meijer store.
- If your mold has a lot of details, tap it gently to get the air bubbles out of the chocolate.
- Put the candy molds in the refrigerator to chill while you make the filling.
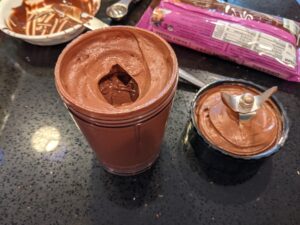
- In a small blender jar (my smallest blender jar holds 1 1/2 cups), mix the dates, nuts, cocoa powder, vanilla extract, and 1/2 cup of water. It should make a puddinglike mixture that blends easily. If it is thicker, add another tablespoon of water and re-blend, repeatedly, until you end up with a mixture with the consistency of pudding, so that the blender can easily circulate it in the blender jar. Then blend it for several minutes, until it is very, very, smooth and silky.
- If your blender made the filling warm, let it cool back down to about room temperature so that it won't melt the chocolate shells.
- Now check the candy molds. Once the chocolate stops being shiny, it is solid enough to add the filling.
- Check each cavity: If you can see silicone anywhere through the chocolate, dab on more chocolate there, to cover the thin spot. (This is easier with silicone molds that are bright colors!)
- Now put a blob of filling into each cavity, inside the chocolate shell. I find it helpful to use a dinnertable knife to scoop up the filling, and then I push it off the knife with the outside of the top of the blender jar, but whatever works to put filling into each cavity is fine. Then tap the molds to flatten out the filling. Add more filling as needed (or remove some, if needed!), until the filling is a little lower than the top of the mold -- the filling should be about 1/8 inch lower than the top of the mold, to make space for the back of the truffles. There should be bare chocolate all around the edges, for the back of the truffle to adhere to. If the filling is covering an edge, you can use a dinnerknife to gently scrape it off.
- Now melt the other 1/2 cup of chocolate chips by putting them into the microwave-safe bowl and microwaving for 1/2 minute, then stir and repeat -- the same process as the first time. If you stir any remaining melted chocolate into the chocolate chips before microwaving, the microwave will heat them more quickly and evenly.
- Now use a dinnerknife to put a small dollop of melted chocolate on top of a truffle. Use the knife to carefully spread the chocolate all the way to the edges so that it will adhere to the rest of the chocolate shell. You may need to add another dab of chocolate in order to cover the whole back of the truffle.
- Repeat for all of the truffles. You may need to melt more chocolate.
- Return to the refrigerator for a couple of hours.
- Once the truffles are solid, pop them out of the molds. Yum!










Comments
Chocolate Truffles – easy, dairy-free, vegan, gluten-free, and delicious! — No Comments
HTML tags allowed in your comment: <a href="" title=""> <abbr title=""> <acronym title=""> <b> <blockquote cite=""> <cite> <code> <del datetime=""> <em> <i> <q cite=""> <s> <strike> <strong>